Today is exactly three weeks from the debut of THE STAR THIEF!!
First, here's a sneak peek at the real, finished, official book!

I couldn't love this more. The colors, the layout, the characters - the gold lettering is embossed, too!
Seriously, this is a dream cover.
Seriously, this is a dream cover.

And it just keeps going! This is the back, with an excerpt, AND planets and Scorpio floating in the background!

One more peek! The chapters each begin with a gorgeous drawing! Eeek!
The whole thing is really amazing. So much work went into this after it left my hands. I'm incredibly proud of the finished product, and I can't wait for the world to see it!
The whole thing is really amazing. So much work went into this after it left my hands. I'm incredibly proud of the finished product, and I can't wait for the world to see it!
In the meantime, let's make a few fun, really easy crafts!
First up, the star garland!

This one is a snap to make, and the stars are double sided, so you can hang it against a wall, as I did here, or string them in the open so the stars can spin freely!

Here are the basic supplies - gold string, and die cut adhesive stars*. This was all at Micheal's craft store, for $2-$5. I used two packages of silver stars, and one of gold.
*The stars seemed like a good shortcut, but that did not turn out exactly as planned. You can also cut out stars from glitter cardstock, or paper and apply glitter as needed. (It's always needed)

To begin, unspool a few feet of the string.
I left approximately 2 feet of string at the end, then started tying my string off every 6 inches. I made loops alternating in 12" lengths and 6" lengths, measuring with a ruler. To make the knots, I tied the loop off the main string like tying a bunny ear shoelace.
The 12" loops will hold 3 stars and the 6" loops hold 2.
For the number of stars I had, I made 5 12" loops, and 4 6" loops, starting and ending with the 12" length.

Since these were adhesive, I planned to just stick them together over the string.
But...
Turns out they weren't especially sticky, and they were made of a pretty sturdy cardboard.
So I added some glue to the back of each star, and held them together with mini clothespins until they dried.
The little clothespins were actually also at Michael's for about $2. I picked them up for something else, but they worked out well for me in a pinch.

For the longer strings, I hung the stars silver-gold-sliver.
For the shorter strings, I hung a gold on top, and a silver below.
My finished garland is about 5 feet long.
And that's it! Garland complete!
Make these as long or short as you want, and hang anywhere you'd like a little more sparkle!
And because that was so easy, let's do one more.
 |
These are made with the same felt, glue, and glitter from the bookmarks in my last post.


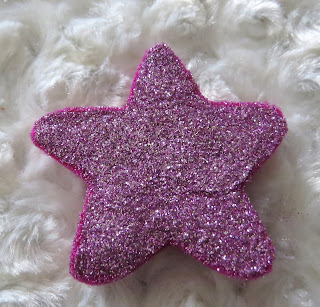


For these, you'll also need some pin backs.
You could also use a magnet or a hair clip, to make stars that will stick to the fridge, or to wear in your hair!

To start, cut two stars from a piece of felt. Make sure the body of the star is wider than the pin back.

Measure the pin back against one of the felt stars.

Snip a little hole in the star for each end of the pin back, open the pin, and slip it through the felt.

It should look something like this on the other side at this point.

Now glue the star with the pin to the other star from the first step.
If you are making magnets, skip the pin steps, and put the magnet in between the stars before gluing them together.

Here's the finished pin back.

Then flip the star over, and apply glue to the front side.
(If you have a magnet in the middle of your star, make sure the grippy side is down. Test the star on the fridge to be sure :)

I suggest placing the pin on wax paper or a piece of scrap paper for this step.

Glitter!!!!

And done. Let this dry at least overnight, and then, make a bunch more!

Use more than one color of glitter, add some rhinestones, make them as fancy as you want!

And now that we've made bookmarks, garlands, and pins, here's a sneak peek at something for the next project... this one will be delicious!


